When it comes to adding Leads, you have two options:
- Add leads one by one
- Upload a CSV file
Adding leads one by one
Perhaps a parent has contacted your school directly and has requested an application from you. Great! Let’s add them to the Relationship Manager so that you can easily keep track of their journey.
To add an individual lead:
-
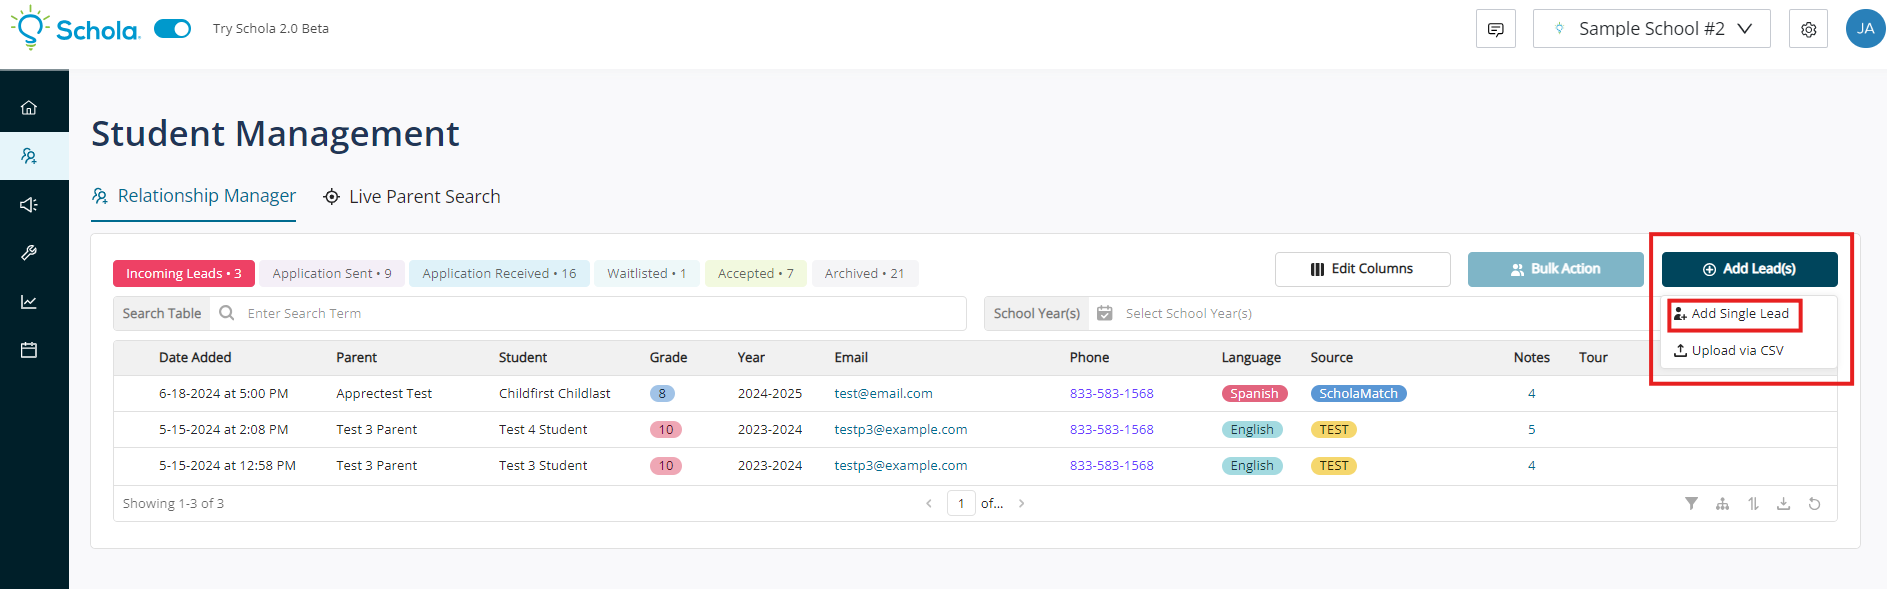
Go to your Relationship Manager and click on “Add Lead(s)” at the top right hand corner of your screen.
-
Then, click on “Add Single Lead”.
-
When you do step 2, a box will appear, on the right hand side, giving you the ability to add information about the parent and the student, as well as what the lead’s status will be, such as “Incoming Leads” and “Application Sent”. It’s important to be thorough with adding the information listed because this information will help you later on.
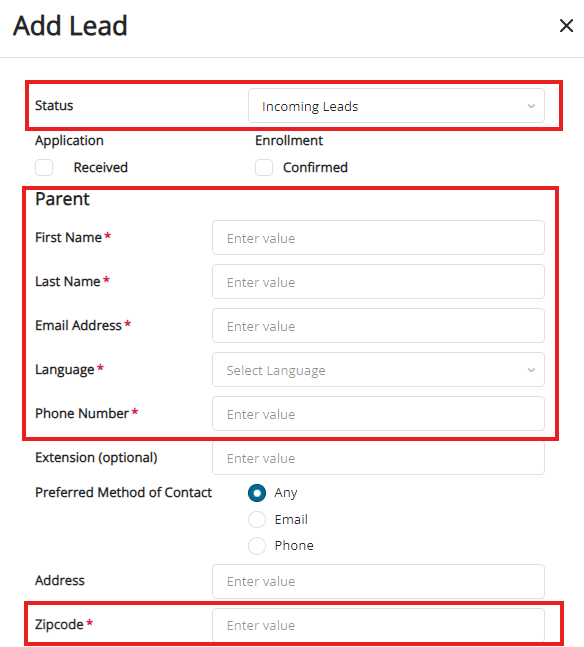
IMPORTANT: Keep in mind that you will need to populate the following fields, at a minimum, in order to add a lead:
- The Parent First Name
- The Parent Last Name
- Email Address
- Phone Number
- ZIP code
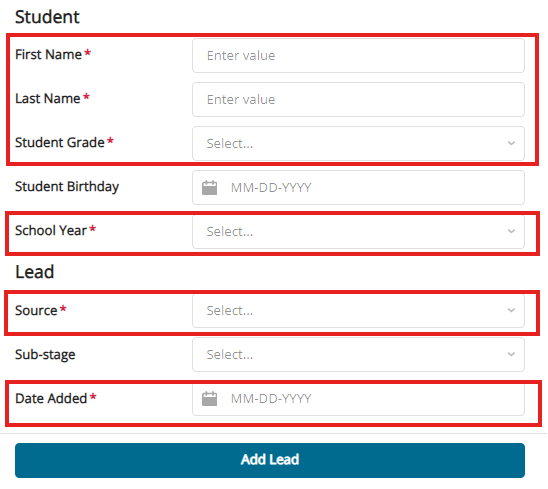
- The Student First Name
- The Student Last Name
- The Student Grade
- School Year
- Source
- Date Added
This may be the minimum data needed to add a contact, but adding more information is always better.
- Lead Source: how you and your team generated this lead. This is a great way to track what leads from different sources convert the most.