The Schola Relationship Manager can be customized to meet your needs and viewing preferences.
Customizing your View
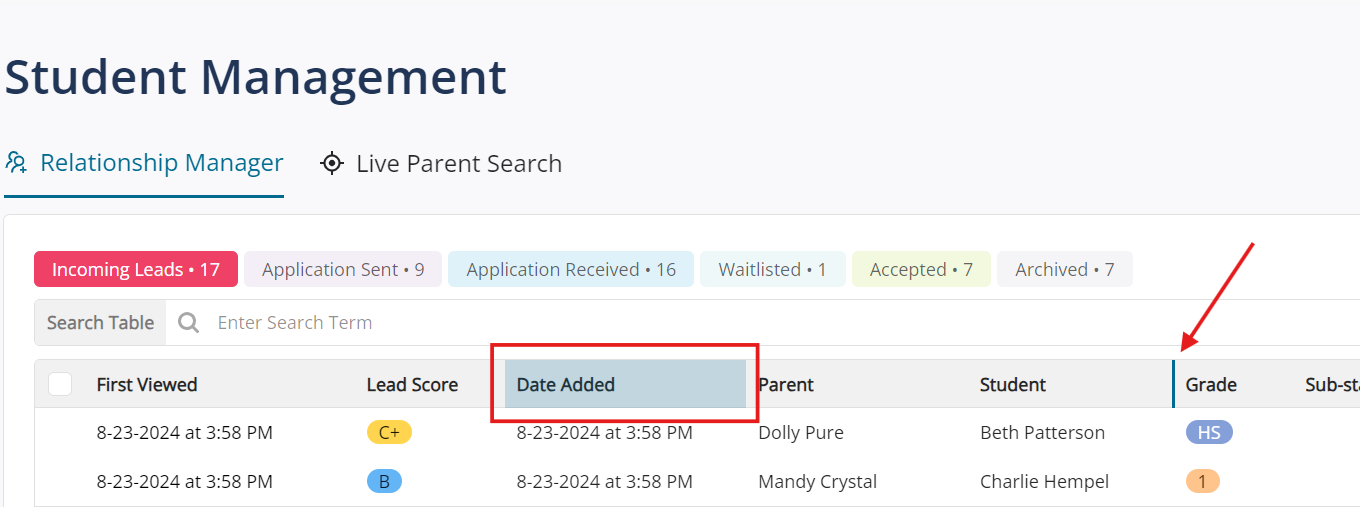
Within the Relationship Manager, you'll see many columns reflecting all the information fields for each Lead. We recognize only so many columns will fit on your screen, so you have the ability to drag and drop columns into your view to prioritize and put into order those fields you want to work with.
To move columns, just click and hold on the title of the column - you'll then see the column title highlighted in blue. Drag to the right or left, and you'll see a dark blue line indicating where the column you've chosen will move to. Release your hold, and the column will move.
In the example below, the Date Added column will be moved in between the Student and Grade columns.
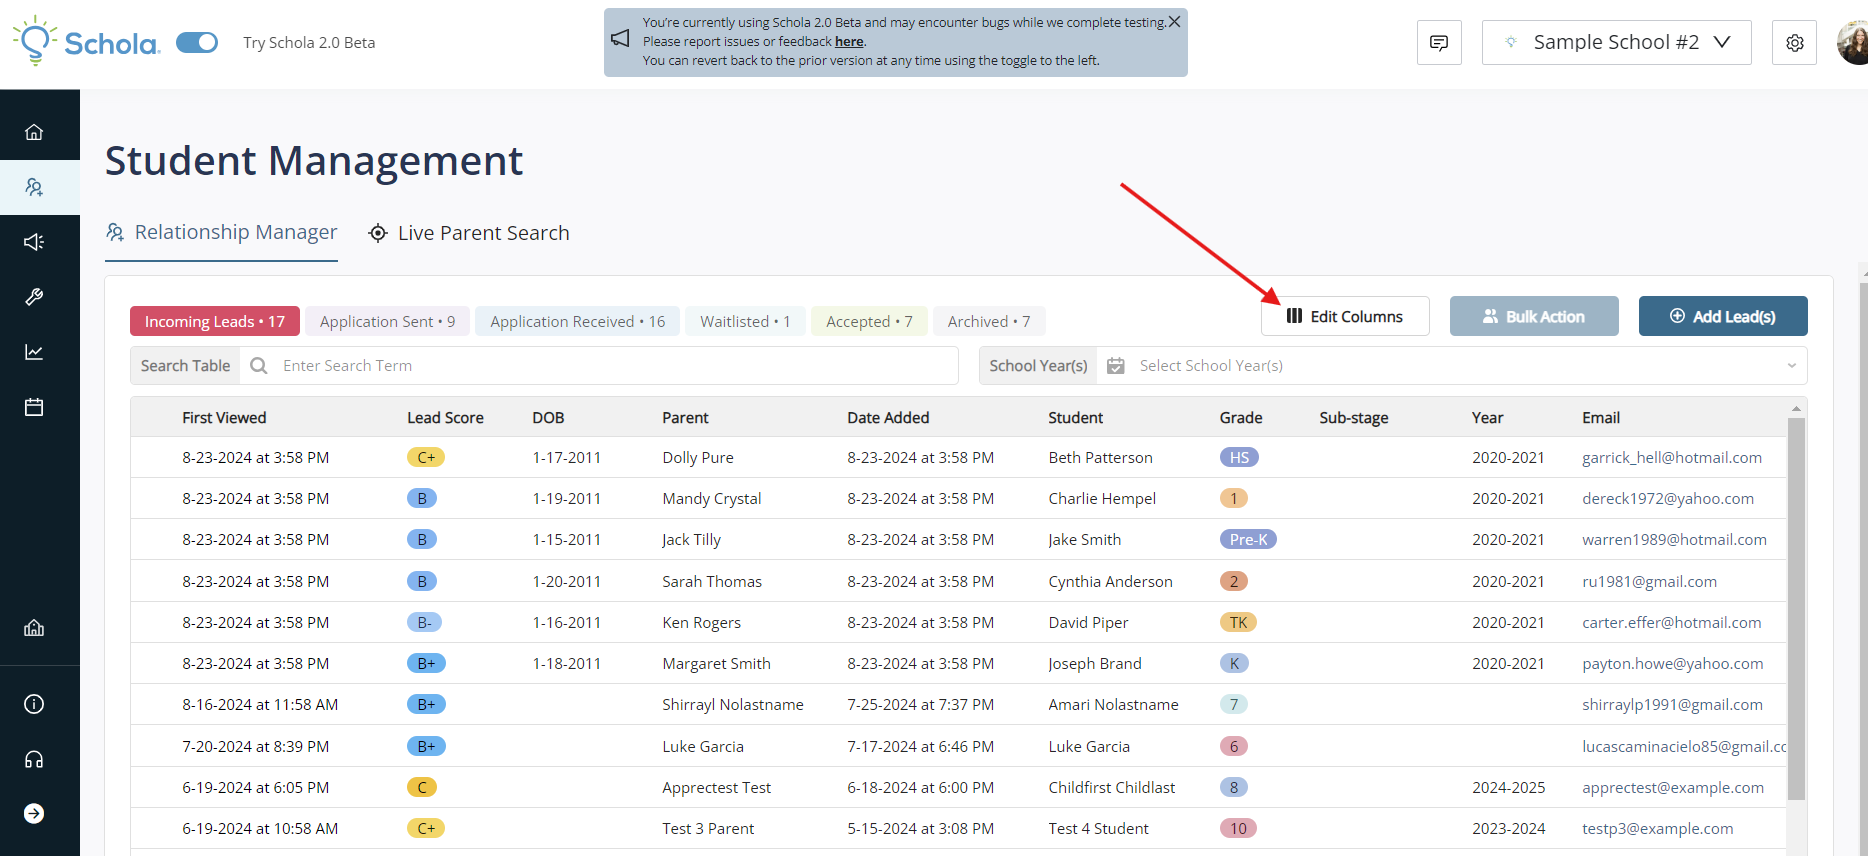
Another way to customize your view can be found in the Edit Columns button at the top right of your Relationship Manager.
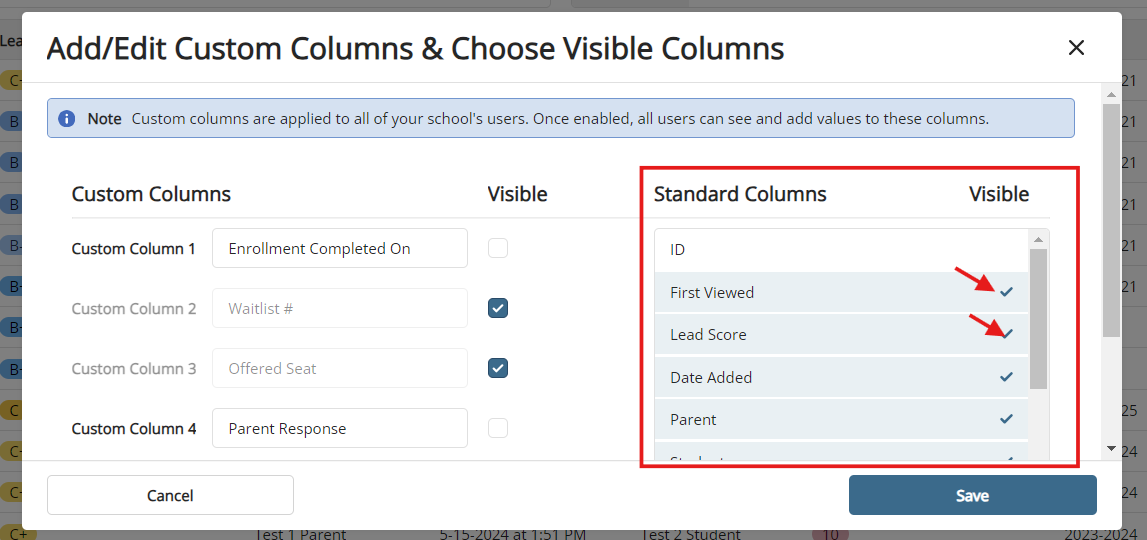
A pop-up window will appear that will allow you to choose which Standard Columns you'd like to have visible in your Relationship Manager view.
Here, you can select or deselect which fields you'd like to see. NOTE: Each user for your School has their own view, and customizations made here will not affect other users on your team.
Be sure to click Save when you're done.
Adding Custom Columns
You may want to add custom fields to your Relationship Manager to track specific information for your School and your Leads. You can do this by adding a Custom Column in Schola.
Click the Edit Columns button at the top right of the Relationship Manager.
A pop-up window will appear that will allow you to create custom columns with information of your choosing. You can add up to 5 Custom Columns.
You can hide or make each individual Custom Column visible in the Relationship Manager by clicking the corresponding checkbox. Be sure to click Save when you're done.
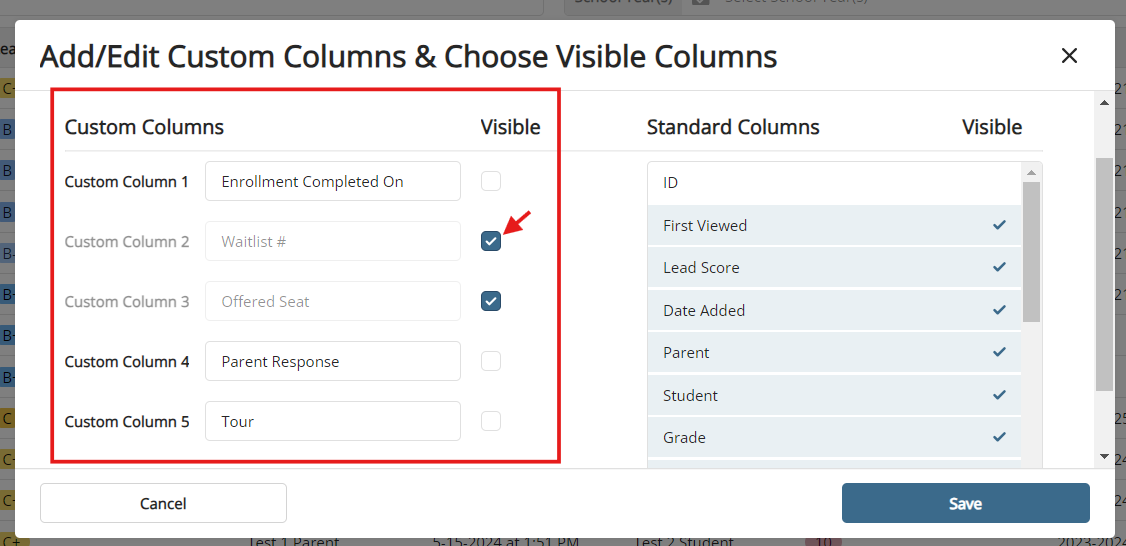
NOTE: Custom Columns will be visible to all of your School's Users.