Advanced Campaigns Overview
- 31 Mar 2025
- 3 Minutes to read
- Print
- DarkLight
Advanced Campaigns Overview
- Updated on 31 Mar 2025
- 3 Minutes to read
- Print
- DarkLight
Article summary
Did you find this summary helpful?
Thank you for your feedback
With all paid Schola plans, you have the ability to create and send automated email and text message campaigns. This is a fantastic way to send curated messages to specific groups of leads within your Schola Relationship Manager tabs throughout the recruitment and enrollment process.
Our new Advanced Campaigns takes it further – a powerful feature that lets you build multi‐channel (email + SMS) campaigns with branching logic, triggers, wait steps, and condition‐based workflows – all within the same interface!
Where to Find Advanced Campaigns in the Schola Platform
From your Schola Admin dashboard, navigate to the left‐hand menu and click Communication Hub. Ensure "Try Schola 2.0 Beta" is toggled on in the top header.
You’ll land on the Message Center by default, which shows inbound/outbound messages and conversations.
Switch to the Campaigns tab at the top to manage your campaigns.
For older or completed campaigns, select the Historical tab.
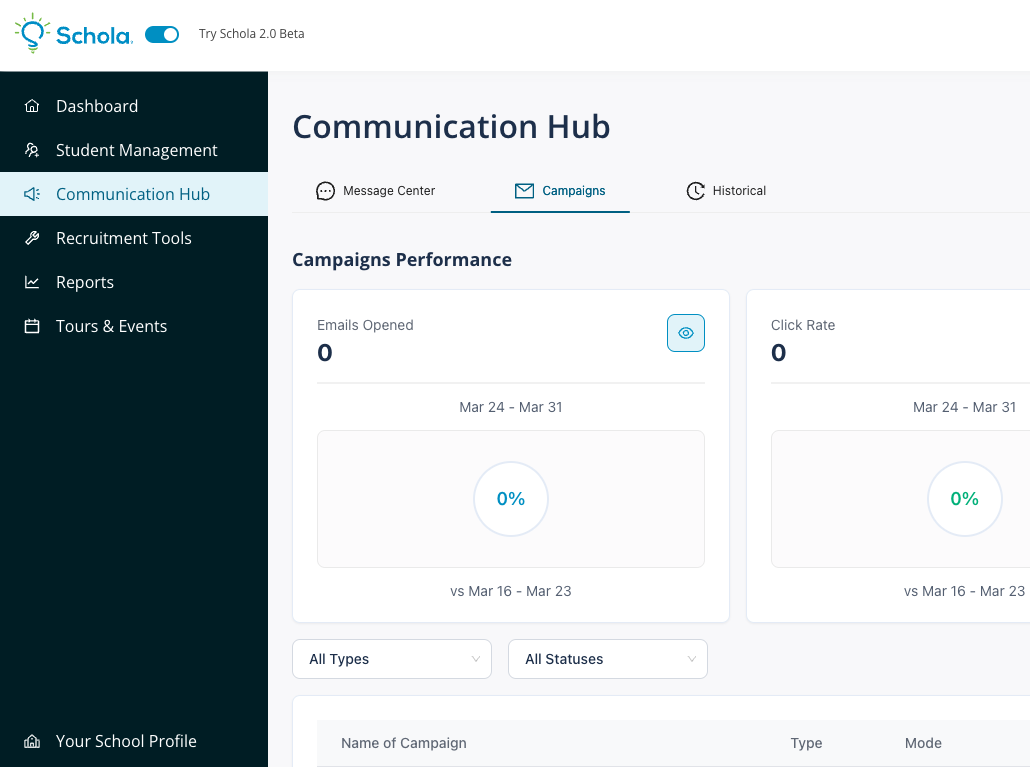
In the Communication Hub, you'll land in the Message Center. Click over to the Campaigns tab to start working with our Advanced Campaigns & Analytics:
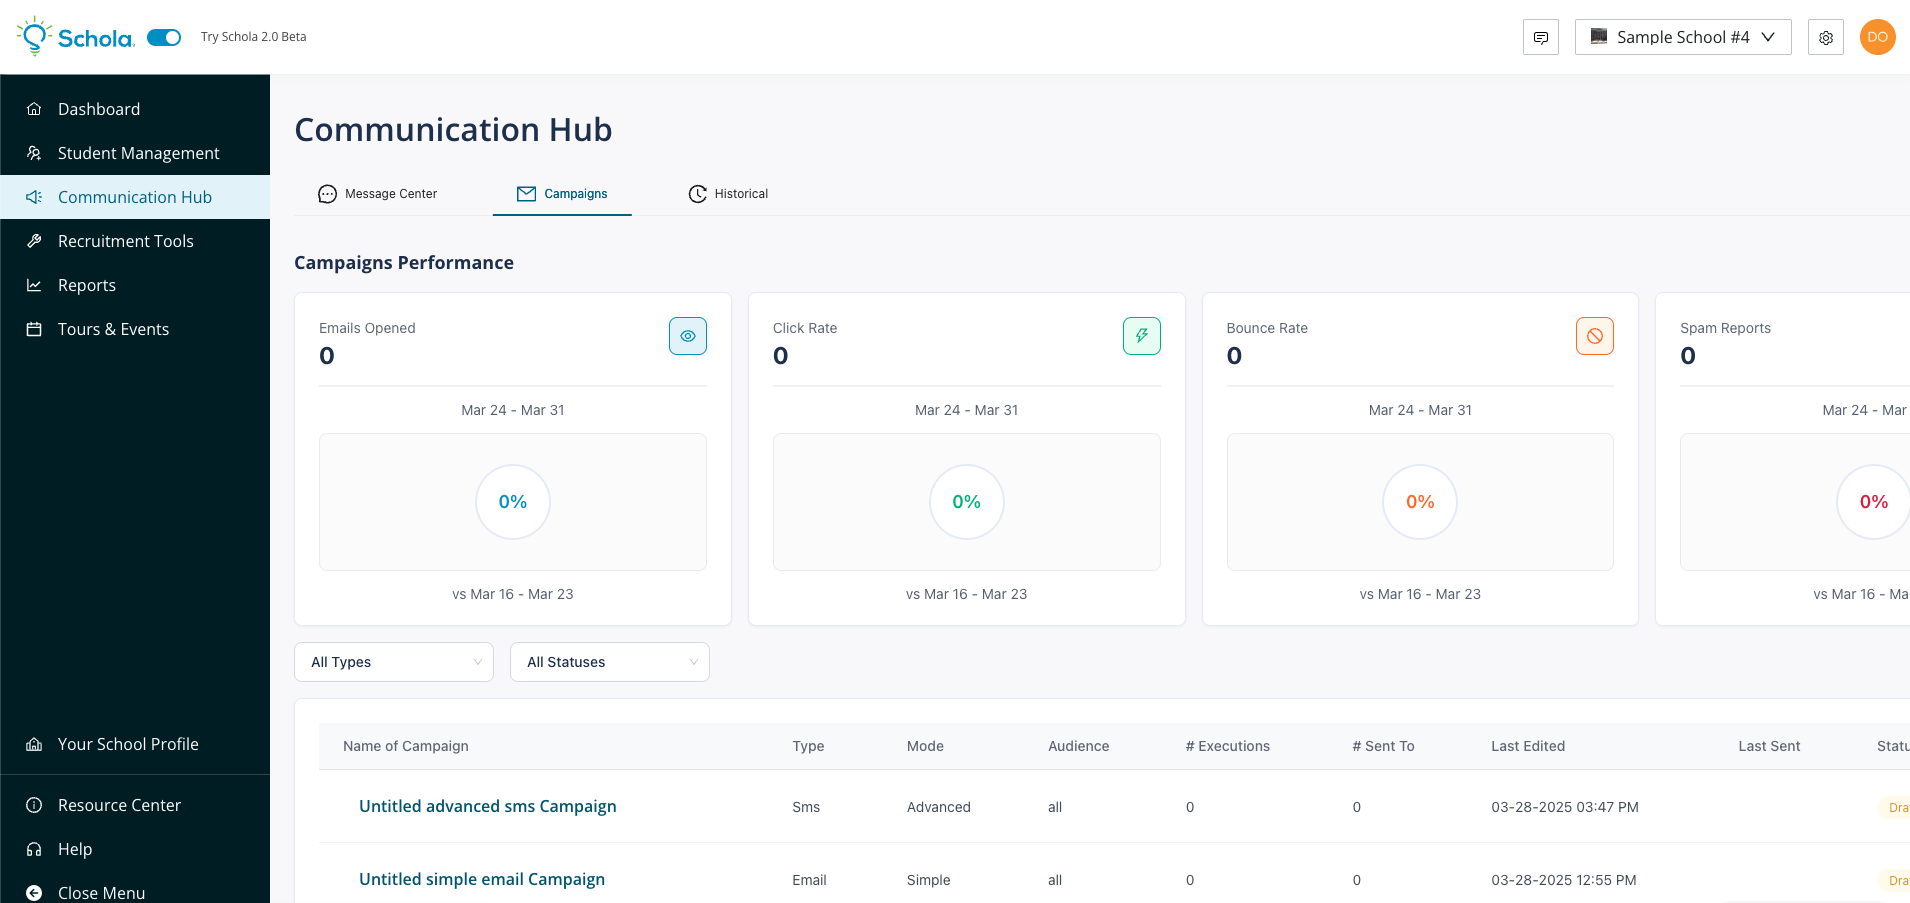
Here in the Campaigns tab, you’ll find:
- Campaigns Performance metrics, displaying key stats (Emails Opened, Click Rate, Bounce Rate, Spam Reports) for the selected date range (e.g., Last 7 days).
- Campaign List below the performance metrics, showing each campaign’s Name, Type, Mode, Audience, # Executions, # Sent To, Last Edited, Last Sent, and Status (Draft, Active, Finished, etc.).
- Filters for All Types and All Statuses so you can quickly locate specific campaigns.
Creating a New Campaign
To create a new campaign:
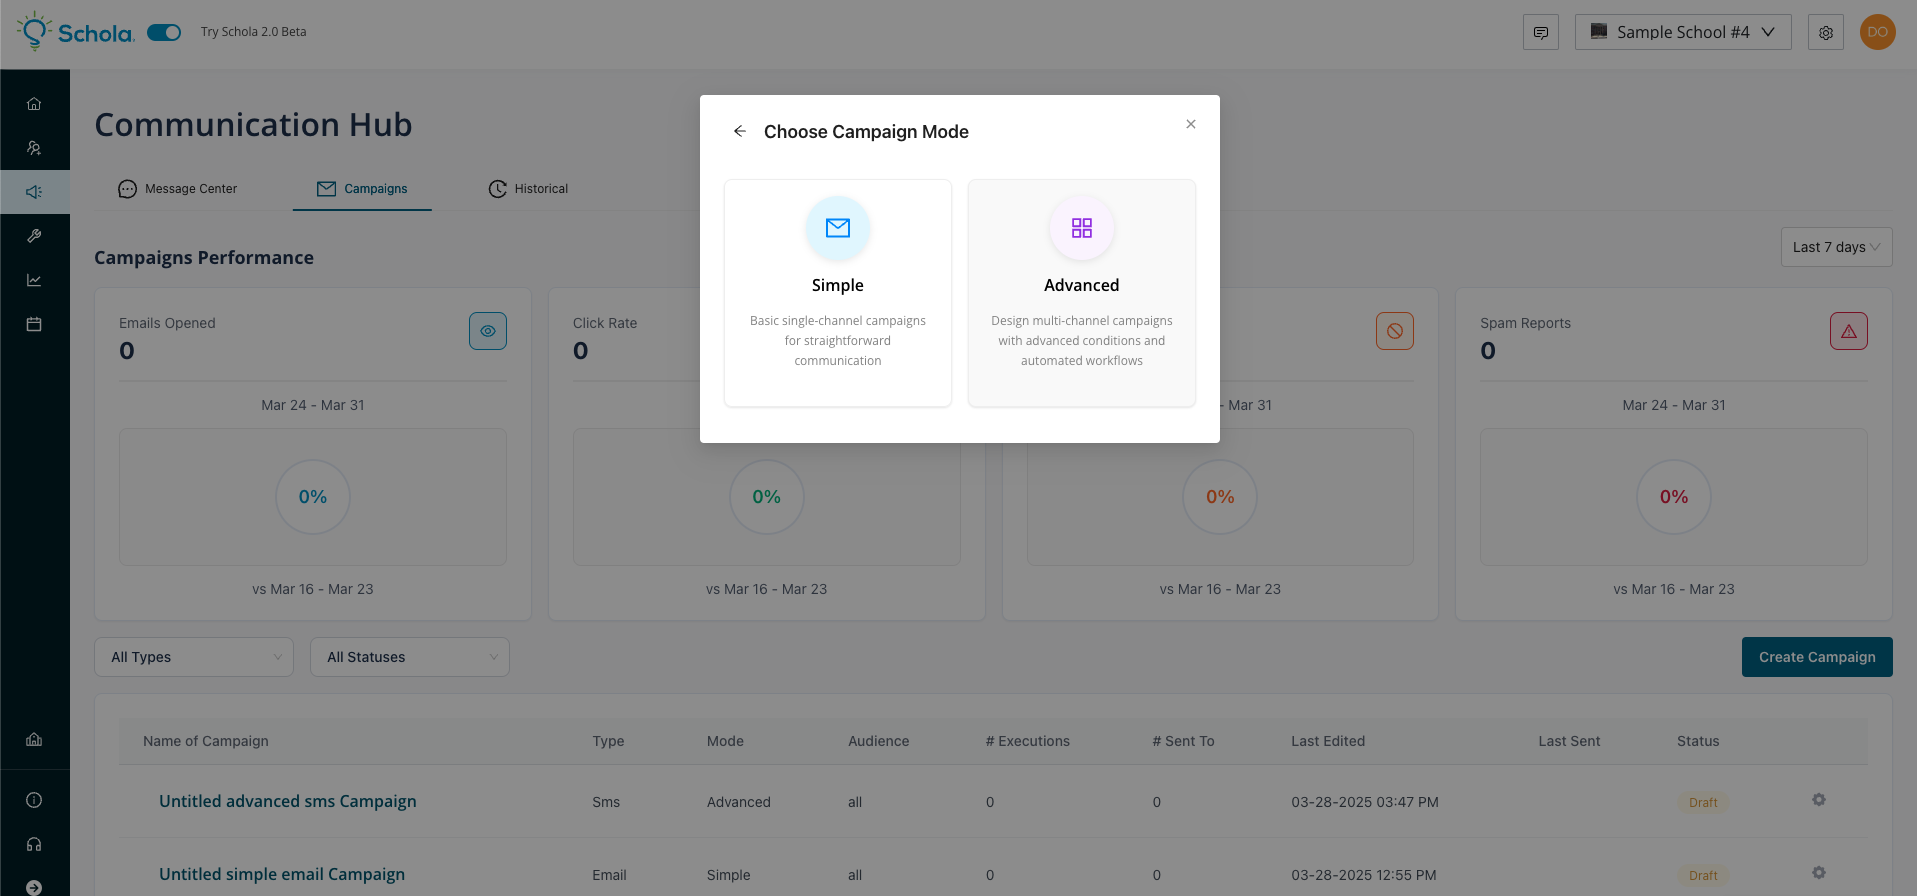
- Click the Create Campaign button in the upper right corner of the Campaigns tab.
- A Choose Campaign Mode window appears, letting you pick between:
- Simple – Single‐channel campaigns for straightforward communication.
- Advanced – Multi‐channel campaigns with advanced conditions, branching, and automated workflows.
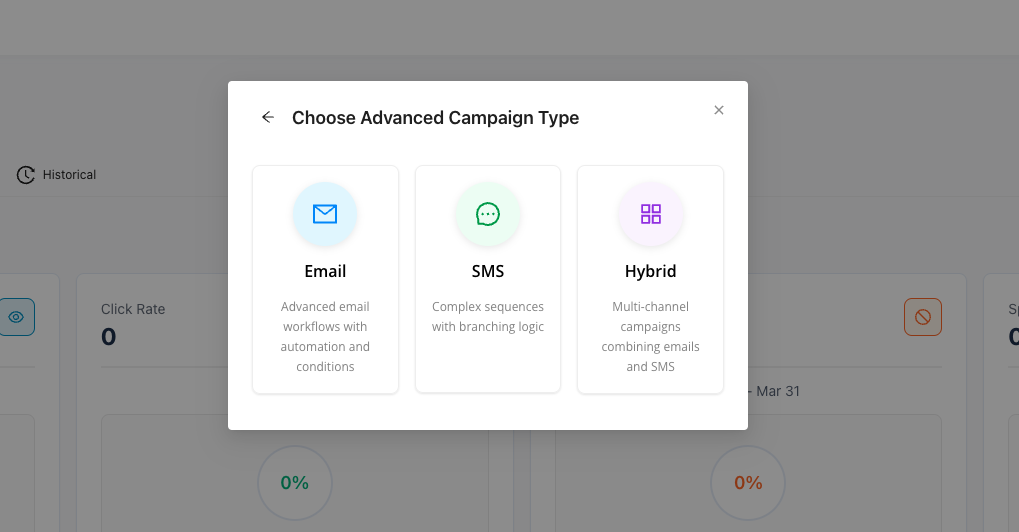
From here, you'll pick whether you want an Email, SMS, or Hybrid (Email + SMS) advanced campaign.
Selecting a Template (Advanced Campaigns)
If you select Advanced, you will see a “Choose Template” window, example options for Hybrid include:
- Hybrid – Application Encouragement
- Hybrid – Next Steps to Enroll
- Hybrid – Event Promotion
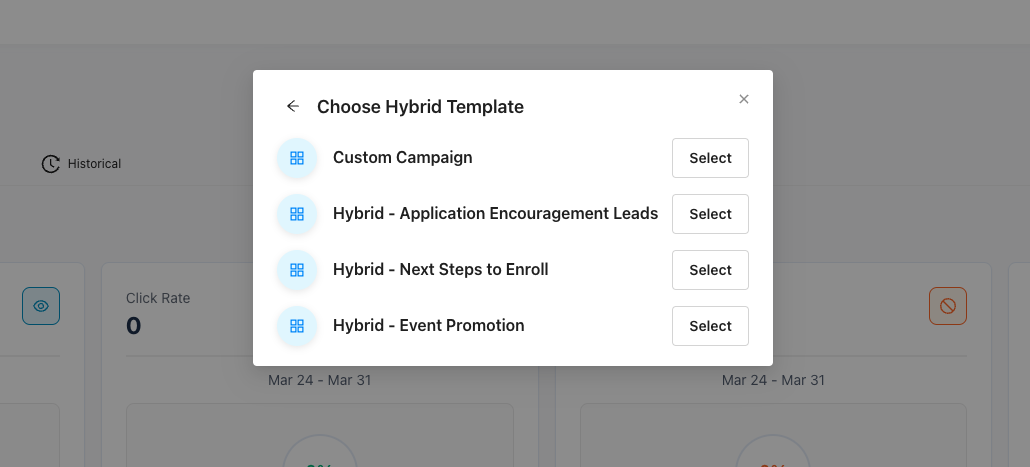
These templates give you a head start on creating multi‐step campaigns with both email and SMS built in, and more will be added in the future!
Building Your Advanced Campaign
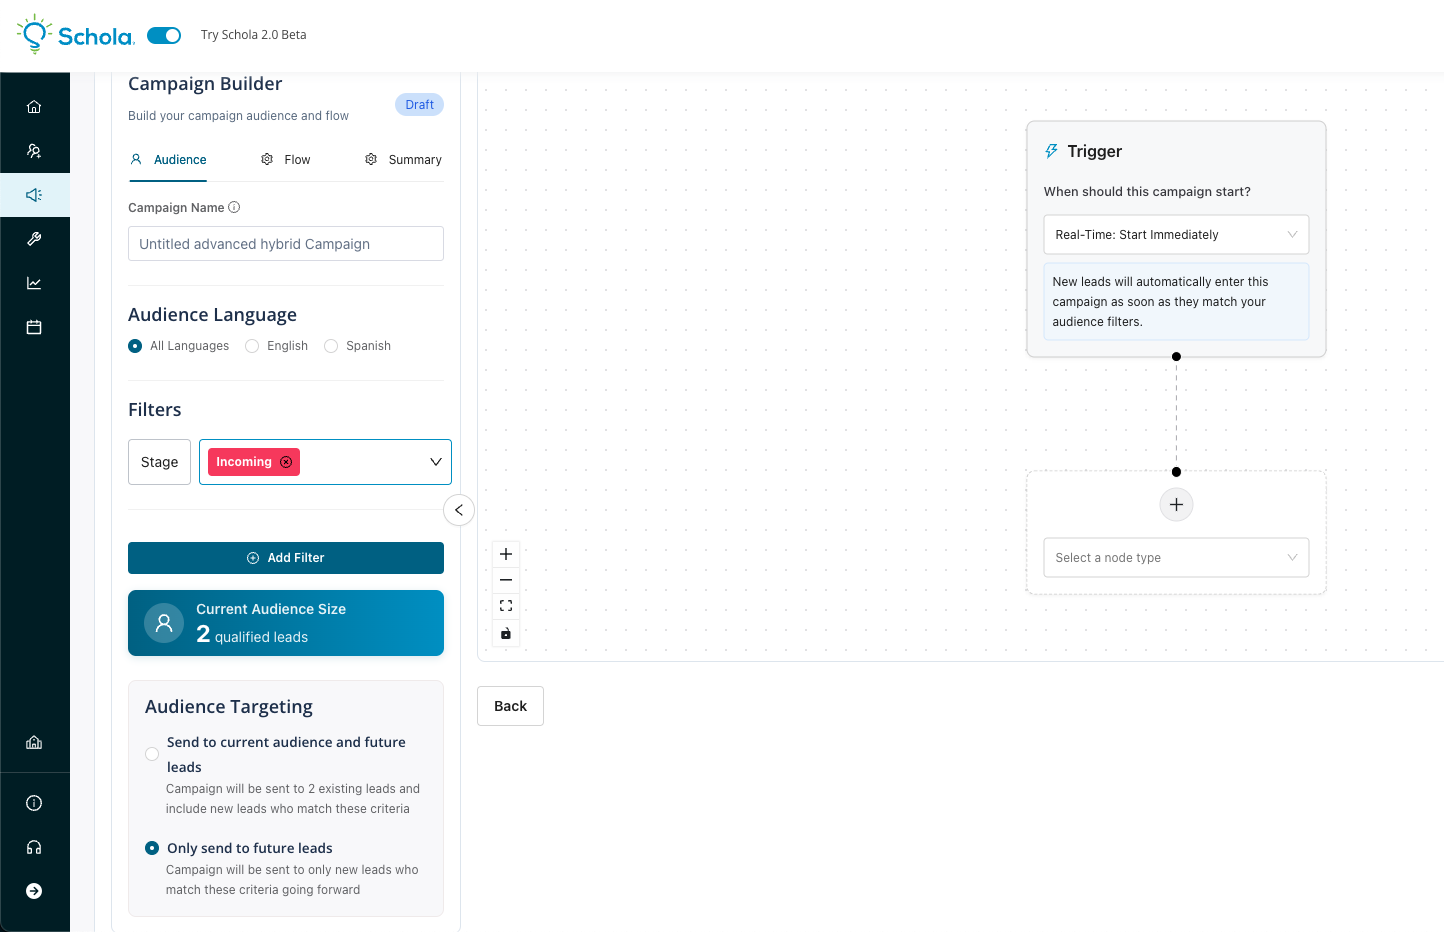
After choosing a template or starting a Custom Campaign, you’ll enter the Campaign Builder screen:
- Audience:
- Name your campaign.
- Select your** Audience Language** (All, English, Spanish).
- Add filters (e.g., Stage, Grade, or custom fields) to narrow your targeting.
- Watch the Current Audience Size update in real time.
- Audience Targeting – Select whether you want to send to current aduience and future leads, or just future leaders.
- Flow:
- Trigger – Decide when this campaign should begin (immediately, or schedule a future date/time).
- Actions – Add Send Email or Send SMS nodes.
- Logic – Insert Wait (time delays) or Condition (branching logic based on opens, clicks, or other lead attributes).
- Arrange the nodes in the canvas to create your desired sequence.
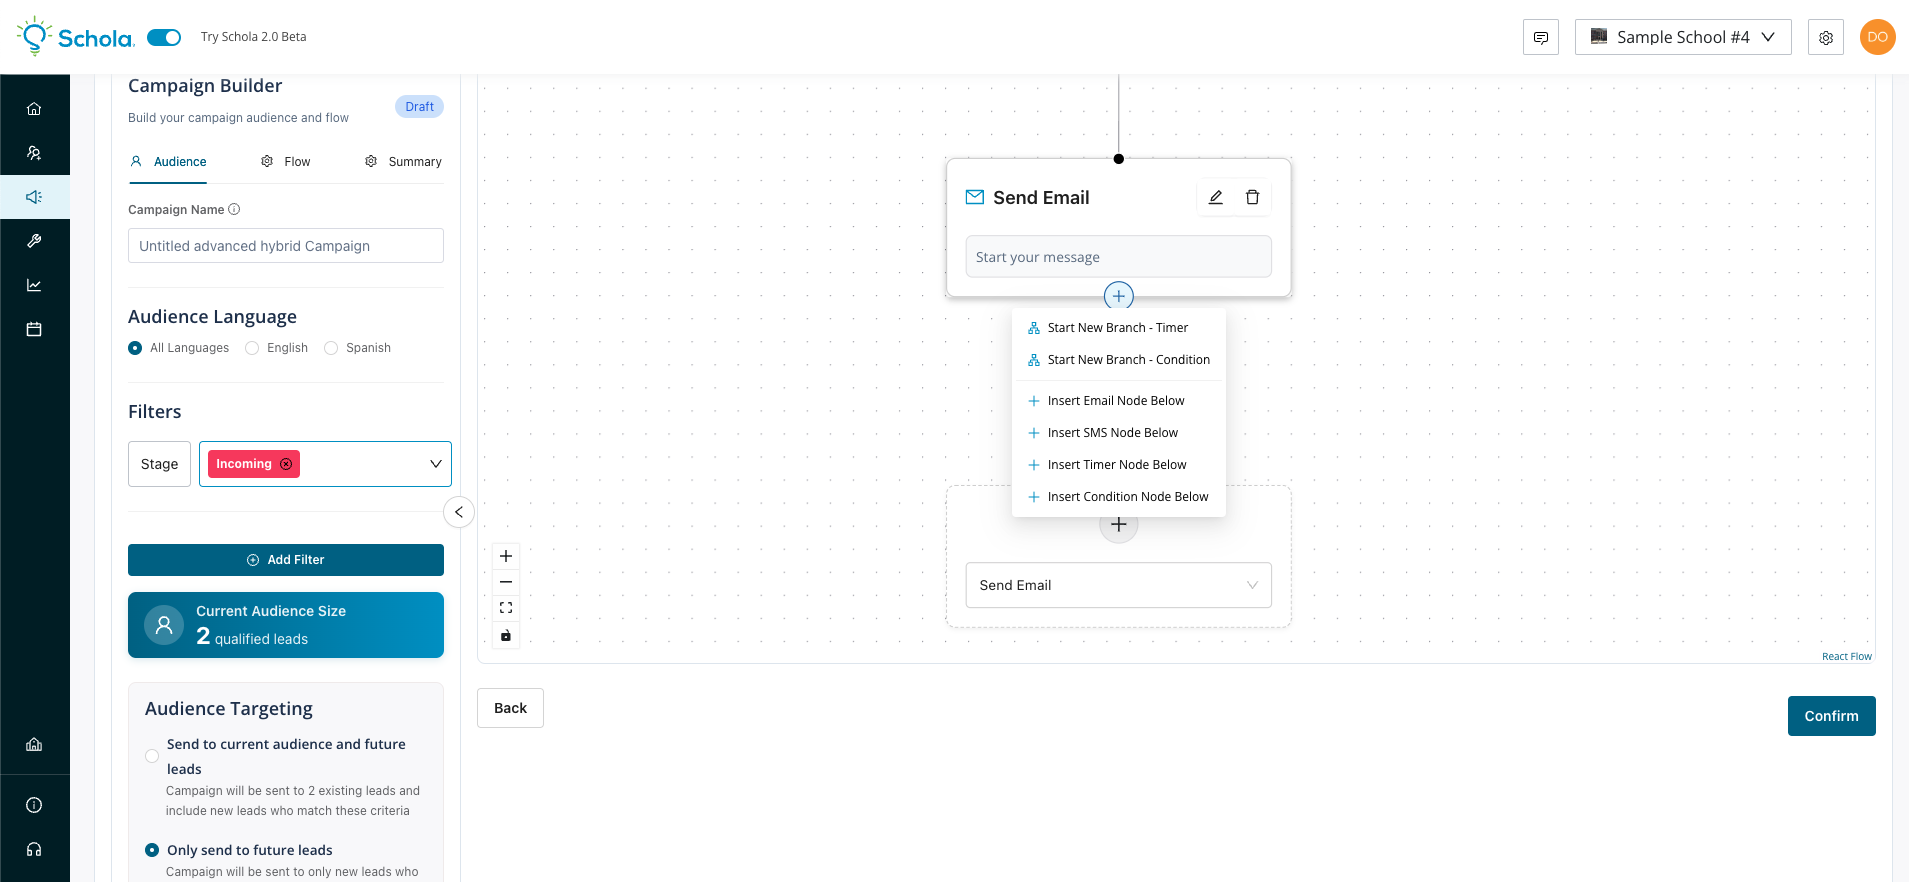
Conditional and In-Line Branching
Sometimes, you need to ensure different behaviors by the recipient are automatically considered in your campaign. Use the Branch Button (+) to add:
- New Branch - Time - Add a branch to trigger after a certain duration has passed without impacting the rest of the flow.
- New Branch - Condition - Add a branch to trigger after a certain recipient behavior takes place (or does not), such as "Opened Last Message", "Clicked Custom Link", and more!
- Insert In-Line Nodes Below - Need to update a sequence? No problem! You can add an email or SMS node before in-line easily.
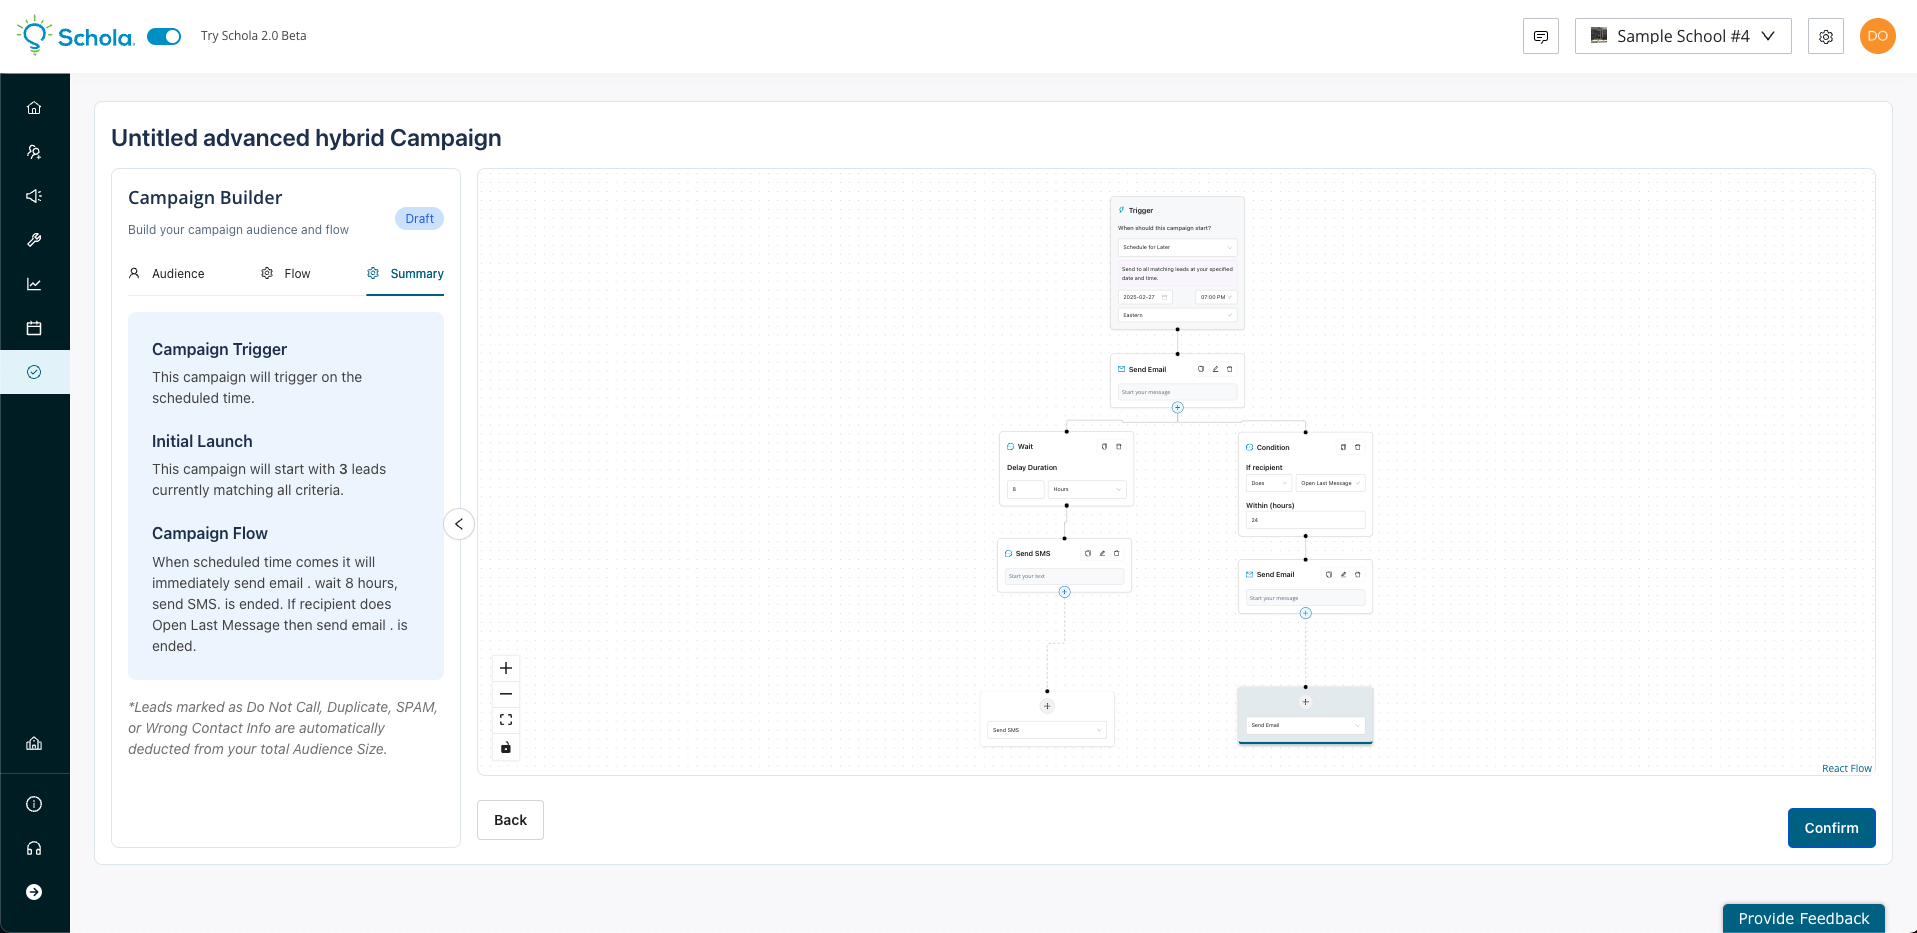
Reviewing Your Campaign
Click the Summary tab to see:
- Campaign Trigger (start date/time or immediate).
- Initial Launch details (how many leads match your criteria).
- Campaign Flow overview (the sequence of steps you’ve built).
Once satisfied, press Confirm. You can choose to:
- Save as Draft – Keep editing later before sending.
- Confirm Publication – Make it active on the specified date/time.
Monitoring Performance
Once your campaign is running (or after it has finished):
- Return to the Campaigns tab to view updated performance metrics under Campaigns Performance.
- Check the campaign row in the list for real‐time data: opens, executions, bounce rates, last sent date, and more.
With Communication Hub and Advanced Campaigns, you can create powerful multi‐channel outreach strategies, automate follow‐ups, and branch your workflow based on lead behavior – all in a single, streamlined interface.
Pro Tip
Check out our repository of Campaign templates here, available for use with all upgraded Schola plans!
Was this article helpful?